In this article, you will learn how to add an email sign-up form to your Opt-In page by following all the steps below. Required: email marketing service, for example, MailerLite (we recommend & use it ourselves), ConvertKit, MailChimp, ActiveCampaign, GetResponse, etc.
Step 1: Create a new sign-up form
Step 2: Insert a sign-up form into your Opt-in page
1. Create a new sign-up form
Please click on the tab below (based on the email marketing service that you use) for the step-by-step to create a new sign-up form and grab the code.
Note:
– Different newsletter provider may display differently
– If there is any updates, please refer to each provider’s documentation
Click on your newsletter provider below
1- Copy your MailerLite embed codes (both): https://www.mailerlite.com/video-tutorials/embedded-forms-overview
2- Replace <SCRIPTS> to the one you copied from MailerLite
<SCRIPTS>
<style type="text/css">
.newsletter-section .subscribe-form .form-section .form-group, .subscribe-form .form-section.horizontal {margin: 0 !important;}
.newsletter-section .subscribe-form {padding: 0 !important;}
.ml-form-embedWrapper, .embedForm {background-color: transparent !important;}
</style>1- Create and find your MailChimp embed code: https://mailchimp.com/help/add-a-signup-form-to-your-website/
2- Copy the specific action attribute URL:

3- Copy the highlighted URL. This will be your MailChimp action attribute URL.
Editing the Newsletter
1- Copy newsletter code below
2- Replace YOUR_MAILCHIMP_ACTION_ATTRIBUTE to the one you copied from MailChimp
<!-- Begin MailChimp Signup Form -->
<form class="newsletter-section-form" action="YOUR_MAILCHIMP_ACTION_ATTRIBUTE" method="post" id="mc-embedded-subscribe-form" name="mc-embedded-subscribe-form" class="validate" target="_blank" novalidate style="text-align:center">
<input type="text" class="newsletter-section-form-input" value="" name="FNAME" id="mce-FNAME" placeholder="Your Name" />
<input type="email" class="newsletter-section-form-input" value="" name="EMAIL" class="required email" id="mce-EMAIL" placeholder="Your Email" />
<input type="submit" class="newsletter-section-form-button" value="Subscribe" name="subscribe" id="mc-embedded-subscribe" class="button" />
</form>
<!-- End MailChimp Signup Form -->
1- Copy your Flodesk embed codes (both): https://help.flodesk.com/en/articles/3200763-how-to-add-an-opt-in-form-to-your-website
2- Follow the Part 2 to insert the Javascript to the newsletter field.
Create ConvertKit Form:
https://intercom.help/convertkit/en/articles/2502640-the-convertkit-form-builder
Get embed code:
https://help.convertkit.com/en/articles/3085392-how-to-embed-forms-on-wordpress-using-javascript#where-to-get-the-embed-code
Note: Make sure to create Inline form and use Javascript embed
Editing the Newsletter
1- Copy newsletter code below
2- Replace <embed code> to the one you copied from ConvertKit
<embed code>
<style type="text/css">
.ck_form.ck_naked .ck_form_fields {padding: 0 !important;}
.page .ck_form.ck_naked {margin: 0 auto !important; max-width: 100% !important;}
.seva-form {margin: 0 auto !important;}
</style>Getting GetDrip newsletter – Step 1
Getting GetDrip newsletter – Step 2
Copy the highlighted text.
Editing the Newsletter
1- Copy newsletter code below
2- Replace YOUR_GETDRIP_ACTION_ATTRIBUTE to the one you copied from GetDrip
<form class="header-newsletter" action="YOUR_GETDRIP_ACTION_ATTRIBUTE" method="post" target="_blank" novalidate>
<input type="text" class="header-newsletter-input" value="" name="fields[user_id]" placeholder="Your Name" />
<input type="email" class="header-newsletter-input" value="" name="fields[email]" placeholder="Your Email" />
<input type="submit" class="header-newsletter-button" value="Subscribe" name="subscribe" class="button" />
</form>
Getting GetResponse newsletter – Step 1
Getting GetResponse newsletter – Step 2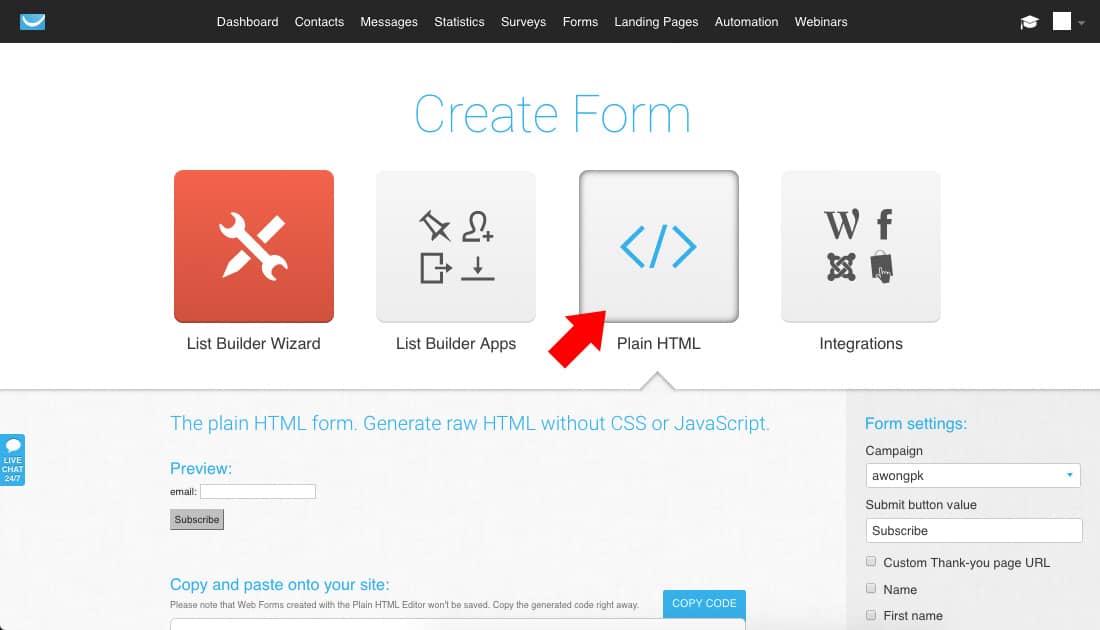
Getting GetResponse newsletter – Step 3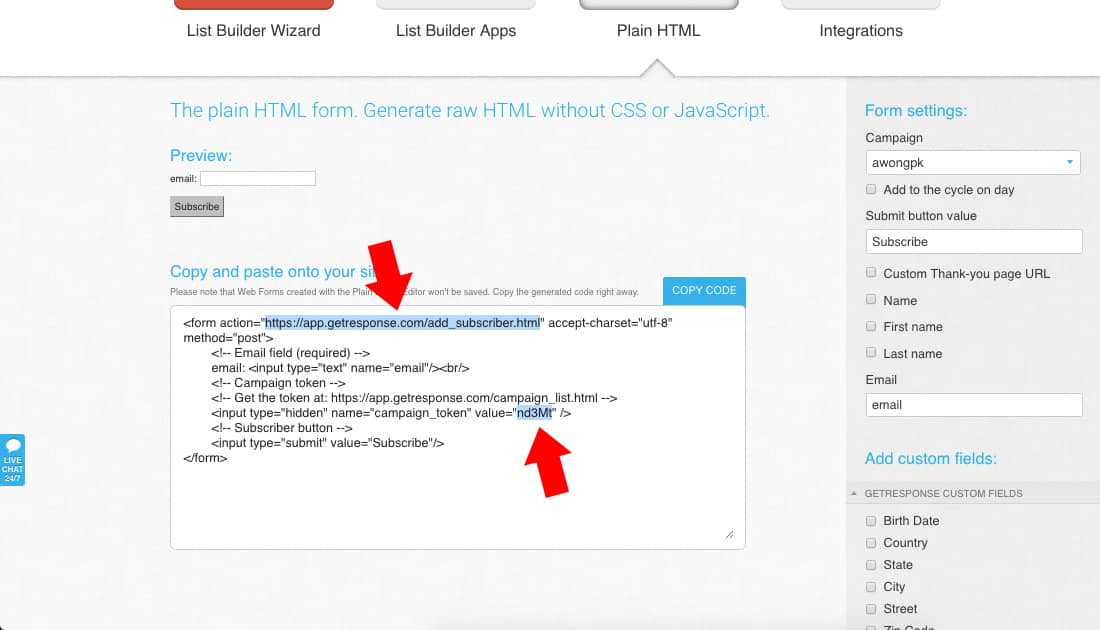
Copy the highlighted text.
Editing the Newsletter
1- Copy newsletter code below
2- Replace YOUR_GETRESPONSE_ACTION_ATTRIBUTE to the one you copied from GetResponse
3- Replace CAMPAIGN_TOKEN to the one you copied from GetResponse
<form class="header-newsletter" action="YOUR_GETRESPONSE_ACTION_ATTRIBUTE" method="post" target="_blank" novalidate>
<input type="text" class="header-newsletter-input" value="" name="name" placeholder="Your Name" />
<input type="email" class="header-newsletter-input" value="" name="email" placeholder="Your Email" />
<input type="hidden" name="campaign_token" value="CAMPAIGN_TOKEN"" />
<input type="submit" class="header-newsletter-button" value="Subscribe" name="subscribe" class="button" />
</form>
2. Insert a sign-up form into your Opt-in page
- Go to your Opt-in Page to edit the sample sign-up form section.
- Remove/Delete the sample sign-up form code.
- Insert the sign-up form code that you’ve copied from Part 1 above into the HTML Code input area.
- Click the Update button.
Test your opt-in page to make sure it works and you’re done!
Q: Where do I store or host my freebie?
Upload your freebie to Google Drive or Dropbox, and copy the download link.
Q: How do my readers get their freebie after signing up?
Go to your email marketing service (MailerLite/ConvertKit/Mailchimp/etc) to set up a welcome email — this is where you’ll add your freebie download link — and automatically sent to people once they have confirmed their subscription to your email newsletter.